
cuisinart instructions ice cream maker
Cuisinart Ice Cream Maker Instructions: A Comprehensive Guide (Updated 12/31/2025)
Welcome! This guide details Cuisinart ice cream maker operation, covering models like ICE-45P1. Explore setup, recipes, troubleshooting, and cleaning for delightful frozen treats.
Today is 12/31/2025 20:19:40 ()
Understanding Your Cuisinart Ice Cream Maker
Congratulations on choosing a Cuisinart ice cream maker! These machines bring the joy of homemade frozen desserts right to your kitchen. Understanding your model – whether it’s the 1.5-quart ICE-45P1 soft serve version or a 2-quart standard model – is the first step.
Cuisinart ice cream makers utilize a unique freezing bowl technology. This bowl requires pre-freezing for optimal performance, typically for 16-24 hours. The machine then churns your mixture, gradually freezing it into creamy ice cream or soft serve. Online resources, like YouTube tutorials (yyjUNFanWAI), offer visual guidance.
Familiarize yourself with the components. Proper operation and maintenance, as detailed in manuals and online reviews, will ensure years of delicious results. Remember to consult the specific instructions for your model!
Model Variations: ICE-45P1 & 2-Quart Models
Cuisinart offers several ice cream maker models, with the ICE-45P1 and 2-quart versions being particularly popular. The ICE-45P1 is specifically designed for creating soft serve ice cream, offering a different churning process and consistency compared to the standard 2-quart model.
The 2-quart model excels at producing traditional, scoopable ice cream. Both models share core components – the freezing bowl, paddle, lid, and motor base – but their functionalities differ. The ICE-45P1 requires careful attention to mixture consistency for optimal soft serve texture, as demonstrated in online guides.
Understanding these distinctions is crucial for achieving the desired results. Refer to your model’s specific manual for detailed instructions and recipe recommendations. Resources like YouTube (yyjUNFanWAI) can visually illustrate the differences.
Key Components and Their Functions
Cuisinart ice cream makers consist of four primary components. The freezing bowl, requiring pre-freezing for at least 24 hours, is vital for initiating the freezing process. The paddle and lid assembly combine to churn and aerate the mixture, creating a smooth texture. Proper assembly ensures efficient operation.
The motor base powers the churning action. It securely holds the freezing bowl and drives the paddle. Understanding each component’s role is key to successful ice cream making. Online resources, including instructional videos, demonstrate proper component interaction.
Ensure all parts are clean and correctly positioned before operation. Refer to the manual for detailed diagrams and safety precautions regarding each component.
Freezing Bowl: Preparation and Importance
Crucially, the freezing bowl must be thoroughly frozen for a minimum of 24 hours before use. This pre-freezing is non-negotiable for proper ice cream consistency. Ensure the bowl is completely dry before placing it in the freezer; any moisture will hinder freezing. A dedicated freezer space prevents temperature fluctuations.
The bowl’s liquid is the cooling agent, so its temperature dictates the ice cream’s success. Avoid refreezing the bowl immediately after use, allowing it to return to room temperature first to prevent damage. Proper preparation guarantees optimal freezing performance, resulting in creamy, delicious results.
Refer to your model’s manual for specific freezing guidelines.
Paddle and Lid Assembly
Correct paddle and lid assembly is vital for efficient churning. The paddle, also known as the dasher, fits securely into the freezer bowl. Ensure it’s firmly connected to the motor’s drive shaft. The lid then snaps onto the bowl, creating a sealed environment for freezing.

The lid features an opening for adding mix-ins during the churning process. Verify the lid is properly locked in place before initiating operation; this prevents splattering and ensures consistent freezing. Improper assembly can lead to uneven freezing or motor strain.
Always double-check the connection points before starting the machine.
Motor Base: Power and Operation
The motor base houses the power switch and drive mechanism. Before use, ensure the base is placed on a stable, level surface. Connect the power cord to a grounded outlet. The power switch typically has “On” and “Off” positions, with some models including a pulse setting.
The motor drives the paddle within the frozen bowl, churning the mixture into ice cream. Operation is generally straightforward: assemble the unit, pour in the mix, and activate the motor. Avoid prolonged operation beyond the recommended time, as this could strain the motor.
Always unplug the unit when not in use and before cleaning.
Preparing for Ice Cream Making
Successful ice cream creation begins with thorough preparation. First, the freezing bowl requires adequate freezing – typically 16-24 hours, ensuring it’s completely frozen solid. Next, select a recipe; Cuisinart makers work best with mixes designed for them. Ingredient preparation is crucial; ensure all ingredients are well-combined and chilled before pouring into the bowl.
Proper chilling minimizes churning time and maximizes texture. Avoid overfilling the bowl, leaving sufficient space for expansion during freezing. Having all components ready streamlines the process, leading to consistently delicious results. Remember, a well-prepared mixture is key!
Freezing the Bowl: Preparation and Importance
Achieving the correct bowl temperature is paramount for successful ice cream making. The Cuisinart freezing bowl must be thoroughly frozen for at least 16-24 hours before use. Place it in the freezer, ensuring it’s level and not obstructed by other items. A completely frozen bowl will feel very cold to the touch and have a slushy sound when shaken;
Insufficient freezing results in soft or un-frozen mixtures. Avoid quick-freezing or placing the bowl in areas with fluctuating temperatures. Re-freezing a partially thawed bowl is acceptable, but requires another full freezing cycle. Consistent, complete freezing guarantees optimal performance and creamy textures.
Recipe Selection: Finding the Right Mix
Successful ice cream creation hinges on using recipes specifically formulated for ice cream makers. Standard custard or pudding recipes often lack the necessary fat content for optimal freezing. Look for recipes with a high dairy-to-sugar ratio, typically including heavy cream, milk, and sugar.
Experimenting with flavors is encouraged, but maintain the base recipe’s proportions. Pre-made ice cream mixes can simplify the process, offering convenience and consistent results. Online resources and Cuisinart recipe books provide a wealth of options, from classic vanilla to innovative fruit combinations. Remember, a well-balanced recipe is key to a delightful frozen dessert!
Ingredient Preparation: Tips for Smooth Results
Achieving a smooth, creamy texture begins with meticulous ingredient preparation. Ensure all ingredients are thoroughly chilled before combining – this speeds up the freezing process and minimizes ice crystal formation. Dairy products should be very cold, and any fruit purees should be pre-frozen for optimal results.
Whisk ingredients together vigorously to fully dissolve sugar and emulsify the mixture. Avoid adding chunky ingredients directly; instead, incorporate finely chopped pieces or purees. Properly prepared ingredients guarantee a consistently smooth and flavorful ice cream experience, maximizing your Cuisinart maker’s potential.
Operating Your Cuisinart Ice Cream Maker
Before beginning, ensure the freezing bowl is thoroughly frozen – a minimum of 24 hours is recommended. Assemble the unit by securely attaching the bowl to the motor base. Next, install the paddle assembly into the bowl, ensuring it spins freely. Carefully pour your chilled ice cream mixture into the bowl, avoiding overfilling – leave at least an inch of headspace.
Secure the lid onto the bowl, aligning it properly with the motor base. Plug in the machine and select the desired setting. The churning process will commence, gradually freezing the mixture. Monitor the consistency, and enjoy!
Assembling the Unit: Step-by-Step Guide
First, position the motor base on a stable, level surface. Then, carefully remove the thoroughly frozen freezer bowl from the freezer. Gently place the bowl onto the motor base, aligning the notch on the bowl with the corresponding groove on the base – a secure fit is crucial.
Next, insert the paddle assembly into the bowl’s center shaft. Ensure it clicks into place, allowing free rotation. Finally, attach the clear lid to the bowl, aligning the tabs for a snug seal. The unit is now assembled and ready for your ice cream mixture!
Pouring in the Mixture: Avoiding Overfill
Carefully pour your prepared ice cream mixture into the freezer bowl through the designated opening in the lid. Crucially, do not exceed the maximum fill line indicated on the bowl – typically, it’s about ¾ full. Overfilling can prevent proper churning and result in a soft, unfreezen consistency.
Remember, the mixture will expand during the freezing process. Leaving sufficient headspace is vital for optimal results. Secure the lid tightly after pouring to prevent splattering during operation. A properly filled bowl ensures efficient freezing and a deliciously creamy texture.
Initiating the Churning Process
Once the lid is securely in place, position the assembled freezer bowl onto the motor base. Ensure it clicks firmly into position for proper operation. Now, plug the ice cream maker into a grounded electrical outlet. Press the power button to begin the churning process.
Typically, the unit will run for approximately 20-25 minutes, depending on your recipe and desired consistency. The machine will automatically shut off when the ice cream reaches a soft-serve stage. For firmer ice cream, you can continue to churn for a few additional minutes or transfer to a freezer.
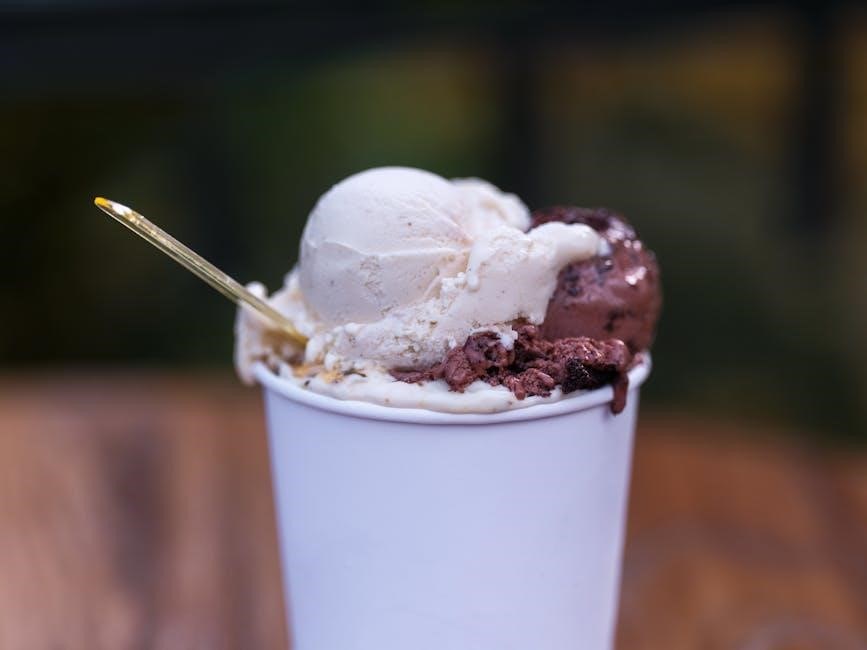
Making Soft Serve Ice Cream
For Cuisinart ICE-45P1 models, achieving perfect soft serve is straightforward. Ensure the bowl is thoroughly frozen, and the mixture is chilled before initiating the churning process. The machine is specifically designed to create a smooth, creamy texture resembling classic soft serve.
Typically, the churning cycle will conclude automatically, leaving you with a ready-to-enjoy treat. If a slightly firmer consistency is preferred, transfer the soft serve to a freezer for 15-30 minutes. Avoid overfilling the bowl, as this can hinder proper churning and result in a less desirable texture.
Specific Instructions for Soft Serve Models (ICE-45P1)
The Cuisinart ICE-45P1 excels at creating soft serve. Begin by ensuring the freezing bowl is completely frozen – a minimum of 24 hours is recommended. Pour your chilled ice cream base into the bowl, being mindful not to exceed the fill line. Secure the lid and paddle assembly, then place the bowl onto the motor base.
Press the power button to initiate the soft serve cycle. The machine will automatically churn the mixture, typically within 20-25 minutes. Monitor the consistency; it should resemble soft serve. For a firmer texture, briefly freeze the finished product. Refer to online resources like YouTube for visual guidance.
Achieving the Perfect Soft Serve Consistency
Perfect soft serve hinges on ingredient ratios and freezing time. Ensure your base is thoroughly chilled before churning – this is crucial. Adjust sugar content; more sugar yields a softer result. Fat content also plays a role; higher fat creates a creamier texture. Monitor the churning process closely.

The ICE-45P1’s automatic shut-off doesn’t guarantee ideal consistency. Check frequently after 20 minutes. If too soft, continue churning in short bursts. For a firmer, yet still soft, serve, transfer to the freezer for 15-30 minutes. Experiment with recipes and adjust based on your preferences, referencing online tutorials for guidance.
Troubleshooting Common Issues
Encountering problems? If your ice cream isn’t freezing, ensure the bowl was frozen solid for at least 24 hours. Verify the freezer temperature is sufficiently low. A sluggish motor often indicates an overloaded machine or insufficient freezing of the bowl. Always unplug the unit before inspecting.
For a mixture that’s too soft, extend the churning time or transfer to the freezer for hardening. Check your recipe; adjustments may be needed. If the motor isn’t running, confirm it’s properly connected to the base. Consult online resources and videos for visual guidance on common fixes.
Ice Cream Not Freezing: Possible Causes
Several factors can prevent your ice cream from freezing correctly. Insufficiently frozen freezing bowl is the most common issue; it requires a minimum of 24 hours in the freezer, at 0°F (-18°C). Ensure nothing obstructs airflow around the bowl. The freezer’s temperature itself might be too warm – verify its setting.
Incorrect ingredient ratios in your recipe can also hinder freezing. Too much fat or sugar can disrupt the process. Overfilling the bowl reduces efficiency. Finally, ambient room temperature plays a role; avoid operating in a very warm environment. Double-check all these points before proceeding.
Motor Not Running: Solutions and Checks
If your Cuisinart ice cream maker’s motor isn’t running, first confirm it’s securely plugged into a working outlet. Test the outlet with another appliance to rule out electrical issues. Ensure the unit is properly assembled; the lid and paddle must be correctly locked into place for operation. A safety feature prevents operation if components aren’t aligned.
Check for any obstructions that might be hindering the motor’s movement. Overloading the machine with a very thick mixture can strain the motor. If the problem persists, inspect the motor base for any visible damage. Contact Cuisinart support if issues remain unresolved.
Mixture Too Soft: Adjusting Recipes and Settings
If your ice cream mixture isn’t freezing to a desirable consistency, several adjustments can be made. First, ensure the bowl is thoroughly frozen – a minimum of 24 hours is crucial. Second, review your recipe; insufficient fat content can result in a soft texture. Adding cream or egg yolks can improve richness.
Consider chilling the base mixture in the refrigerator for several hours before churning. For soft serve models (like ICE-45P1), a shorter churning time is expected. Experiment with slightly reducing the liquid content in your recipe. Finally, ensure the machine isn’t overfilled, allowing for proper expansion during churning.
Cleaning and Maintenance
Proper cleaning ensures longevity and hygiene of your Cuisinart ice cream maker. Always unplug the motor base before disassembly. The freezing bowl, paddle, and lid are typically dishwasher-safe (top rack recommended), but hand washing with warm, soapy water is gentler. Avoid abrasive cleaners which can damage surfaces.
The motor base should never be immersed in water; wipe it clean with a damp cloth. Thoroughly dry all components before reassembling and storing. Store the unit in a cool, dry place. Regular maintenance prevents buildup and ensures optimal performance for years of delicious homemade ice cream.
Disassembling the Unit for Cleaning
Before cleaning, ensure the Cuisinart ice cream maker is unplugged. Remove the freezing bowl from the motor base by gently lifting upwards. Detach the paddle assembly from the bowl’s lid; usually, a simple twist is sufficient. The lid itself can then be removed.
These three components – bowl, paddle, and lid – are the primary parts needing regular cleaning. The motor base requires only wiping down. Inspect the paddle for any remaining ice cream residue and remove it carefully. Proper disassembly simplifies the cleaning process and prevents damage to delicate parts.
Washing the Components: Safe Methods
The freezing bowl and lid are typically dishwasher-safe, ideally on the top rack. However, hand washing with warm, soapy water is recommended to preserve its chilling properties. The paddle assembly should always be hand-washed; avoid dishwashers as heat can warp the plastic.
Never use abrasive cleaners or scouring pads, as these can scratch the surfaces. Ensure all soap residue is thoroughly rinsed away. Dry all components completely before reassembling. Avoid immersing the motor base in water; wipe it clean with a damp cloth only. Proper cleaning ensures hygiene and longevity.
Proper Storage: Protecting Your Investment
To maximize the lifespan of your Cuisinart ice cream maker, proper storage is crucial. Ensure the freezing bowl is completely dry before storing to prevent corrosion. Store the bowl in a freezer bag to protect it from absorbing odors. Keep all components in a cool, dry place, away from direct sunlight.
Avoid stacking heavy items on top of the unit, which could cause damage. The motor base should be stored separately from the freezing bowl. Regularly check for any signs of wear and tear. Following these guidelines will help maintain optimal performance for years to come.
Recipes and Inspiration
Unleash your creativity with a world of frozen dessert possibilities! Start with our basic vanilla ice cream recipe – a perfect foundation for experimentation. Elevate your creations with a rich chocolate variation, adding cocoa powder and chocolate chips. For a refreshing treat, explore fruit-based options like strawberry or mango ice cream.
Don’t limit yourself! Combine flavors – think mint chocolate chip, coffee caramel, or lavender honey. Online resources offer countless recipes tailored for Cuisinart ice cream makers. Experiment with different mix-ins like nuts, cookies, and candies. Enjoy the process and savor the delicious results!
Basic Vanilla Ice Cream Recipe
Ingredients: 2 cups heavy cream, 1 cup whole milk, ¾ cup granulated sugar, 1 tablespoon vanilla extract. Instructions: Combine cream, milk, and sugar in a saucepan. Heat gently, stirring until sugar dissolves – do not boil! Remove from heat and stir in vanilla extract. Chill the mixture thoroughly for at least 2 hours, or preferably overnight.
Pour the chilled mixture into your frozen Cuisinart ice cream bowl. Process for 20-25 minutes, or until it reaches your desired consistency. Enjoy immediately for soft serve, or freeze for a firmer texture. This simple recipe is a fantastic starting point for endless flavor variations!
Chocolate Ice Cream Variation
To transform the basic vanilla recipe into a rich chocolate delight, simply add ½ cup of unsweetened cocoa powder to the saucepan along with the sugar and milk. Whisk thoroughly to ensure the cocoa powder dissolves completely, preventing any grainy texture. Continue heating gently, stirring constantly, until the sugar is fully dissolved.
Proceed with chilling the mixture as described in the vanilla recipe – thorough chilling is crucial for optimal results. Follow the same churning process in your frozen Cuisinart bowl for 20-25 minutes. For an even more decadent treat, add chocolate chips during the last few minutes of churning!

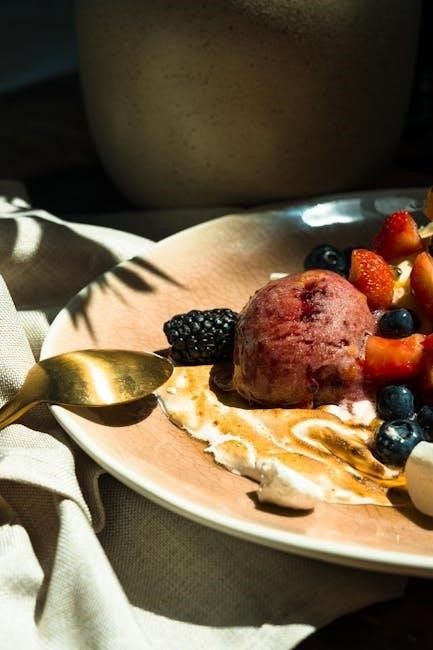
Fruit-Based Ice Cream Options
Creating vibrant fruit ice creams is wonderfully simple! Begin with approximately 2 cups of your favorite fresh or frozen fruit – berries, peaches, mangoes all work beautifully. Puree the fruit until smooth, then strain to remove any seeds or skins for a silkier texture. Combine the fruit puree with the standard Cuisinart ice cream base (milk, cream, sugar, vanilla).
Adjust the sugar level to taste, as fruits vary in sweetness. Churn in your pre-frozen bowl for 20-25 minutes, or until it reaches your desired consistency. For a more intense fruit flavor, consider adding a tablespoon of fruit liqueur or a squeeze of lemon juice!
Exploring Other Flavor Combinations
Beyond vanilla and chocolate, the possibilities are endless! Try infusing your base with coffee beans for a rich mocha flavor, or steep mint leaves for a refreshing treat. Consider swirling in peanut butter, Nutella, or crushed cookies after the initial churn for added texture and taste.
Spices like cinnamon, nutmeg, or cardamom can elevate your ice cream to new heights. Don’t be afraid to experiment with savory elements – a pinch of sea salt can enhance sweetness. Remember to adjust ingredient quantities to achieve balanced flavors. Have fun and create your signature Cuisinart masterpiece!
Safety Precautions

Always unplug your Cuisinart ice cream maker before cleaning or disassembling. Never immerse the motor base in water or other liquids. Ensure the unit is on a stable, level surface during operation to prevent tipping. Avoid operating the appliance with a damaged cord or plug.
Keep hands and utensils away from moving parts while the machine is running. Supervise children closely when the ice cream maker is in use. Do not attempt to repair the unit yourself; contact qualified service personnel. Proper storage protects the investment and ensures longevity.
Electrical Safety Guidelines
Always ensure your outlet voltage corresponds to the voltage listed on the Cuisinart ice cream maker’s nameplate. Never operate the appliance with a damaged power cord or plug; immediate replacement is crucial. Avoid using extension cords if possible; if necessary, use a heavy-duty extension cord rated for the appliance’s wattage.
Do not operate the ice cream maker in a wet or damp environment. Keep the appliance away from heat sources. Unplug the unit when not in use and before cleaning. Never insert any object into the electrical connections. Contact a qualified electrician for any electrical concerns.
Avoiding Damage to the Unit
Protect your Cuisinart ice cream maker by never operating it without the freezing bowl being completely frozen – a minimum of 24 hours is recommended. Do not overfill the bowl, as expansion during churning can cause damage. Avoid using metal utensils inside the bowl, opting for wooden or plastic instead.
Ensure the paddle and lid are securely assembled before operation. Never attempt to disassemble the motor base while it’s plugged in. Clean the unit thoroughly after each use, preventing residue buildup. Store the appliance in a cool, dry place, away from direct sunlight and extreme temperatures.
Supervision During Operation
Constant supervision is crucial when the Cuisinart ice cream maker is in use, especially around children. Never leave the appliance unattended while churning, monitoring for any unusual noises or malfunctions. Ensure the power cord remains clear of water and heat sources during operation. Instruct all users on proper operation and safety precautions.
Be mindful of the moving parts during the churning process, keeping hands and utensils clear. Immediately unplug the unit if any issues arise, such as sparking or smoke. Do not attempt to repair the appliance yourself; contact Cuisinart customer support for assistance. Prioritize safety for a delightful ice cream experience.


Leave a Reply
You must be logged in to post a comment.